
If there is one thing I am really enjoying about life in lockdown, is all the extra time I have to cook. Dan and I both really enjoy cooking which is a real bonus, but over the last few weeks, we have been making our way through our ‘bucket list’ and cooking up recipes we’ve always wanted to try. One of the meals we have both always wanted to make is bao. Since visiting Tiger Bites Pig in Birmingham (AKA bao lover’s heaven) our love for these soft, steamed buns filled with deliciousness has grown.

There aren’t many independent spots in Milton Keynes that offer bao. Yes, I know that Wagamamas and Marks & Spencer sell them, but you know that I am all about the independents on here, so cooking them at home it is. Plus – these buns are so cheap and easy to make, not to mention very satisfying!
As we are all spending more time at home, I thought that I would share our bao creation with you to inspire you to recreate it at home.
The bao recipe we used made 20 buns which we ate across two dinners. For the first set, we made Chinese braised pork which was a recipe from Girl Eats World. It was so delicious and very simple if you are a beginner bao maker! For the second meal, we made fried chicken in a sriracha soy honey marinade, which was totally our own recipe, so this is the recipe I’ll be sharing with you today. I can’t take any credit for the bao bun recipe it’s by Izy Hossack, but I’ve included it here with the link to the full recipe for reference.
Where can I buy Asian ingredients in MK?
I appreciate that some of the ingredients in this recipe are not your typical stock cupboard items, but they are easy to get hold of as MK is home to a few Asian Supermarkets that remain open.
Central Oriental
My favourite place to buy Asian cooking essentials in Milton Keynes is Central Oriental near Bradwell Abbey. If you know Mii & U, one of my favourite cheap eat spots in MK, Central Oriental is the supermarket in the same building.
It remains open and has everything you need for Asian cooking at home. It’s a wholesaler, so it is so much cheaper than the supermarkets (large bottles of soy are around £2-3) I bought everything I needed for this recipe, plus a bamboo steamer, which I do recommend buying if you are planning on making bao at home. I bought an 8-inch two-tier steamer for around £10.
You can find out more about Central Oriental in my lockdown shopping guide.
Hoo Hing
Hoo Hing is Asian wholesaler and supermarket in Bletchley that has a website and is offering free home delivery for addresses within a 5 mile radius in case you can’t leave the house. Courier delivery is also available if you live further than the radius.
I haven’t been to Hoo Hing before but I have been recommended it by a few of my readers after posting about Central Oriental, so it’s worth checking out.
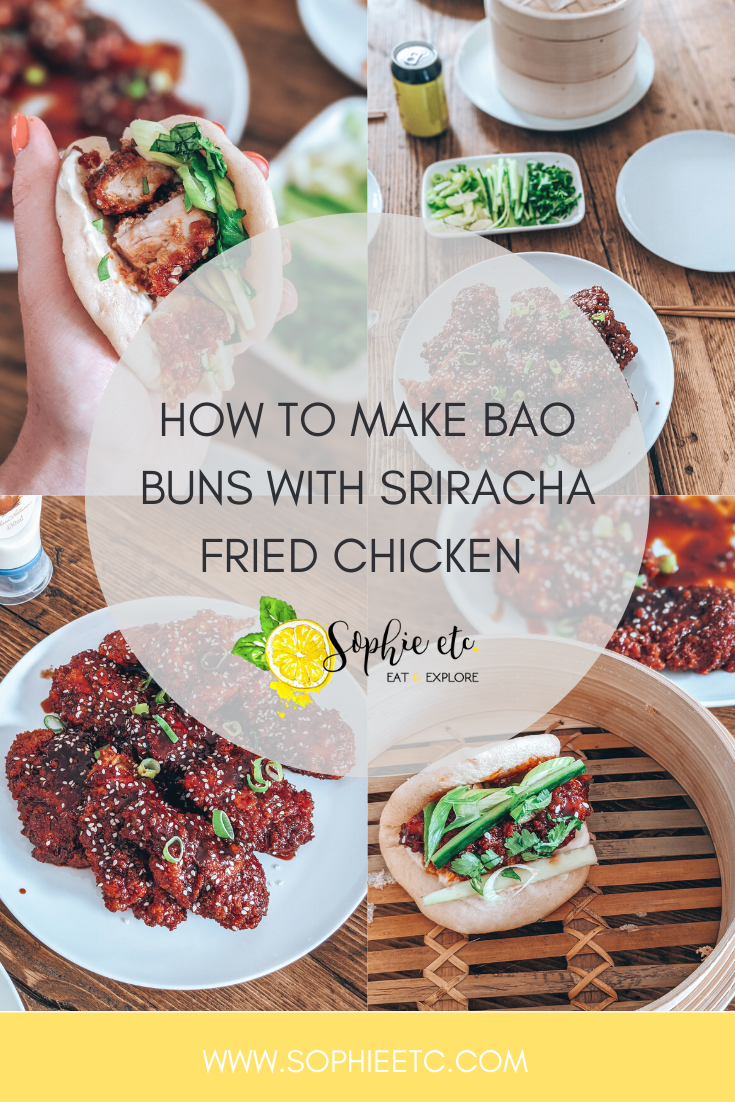
How to make Sriracha Fried Chicken
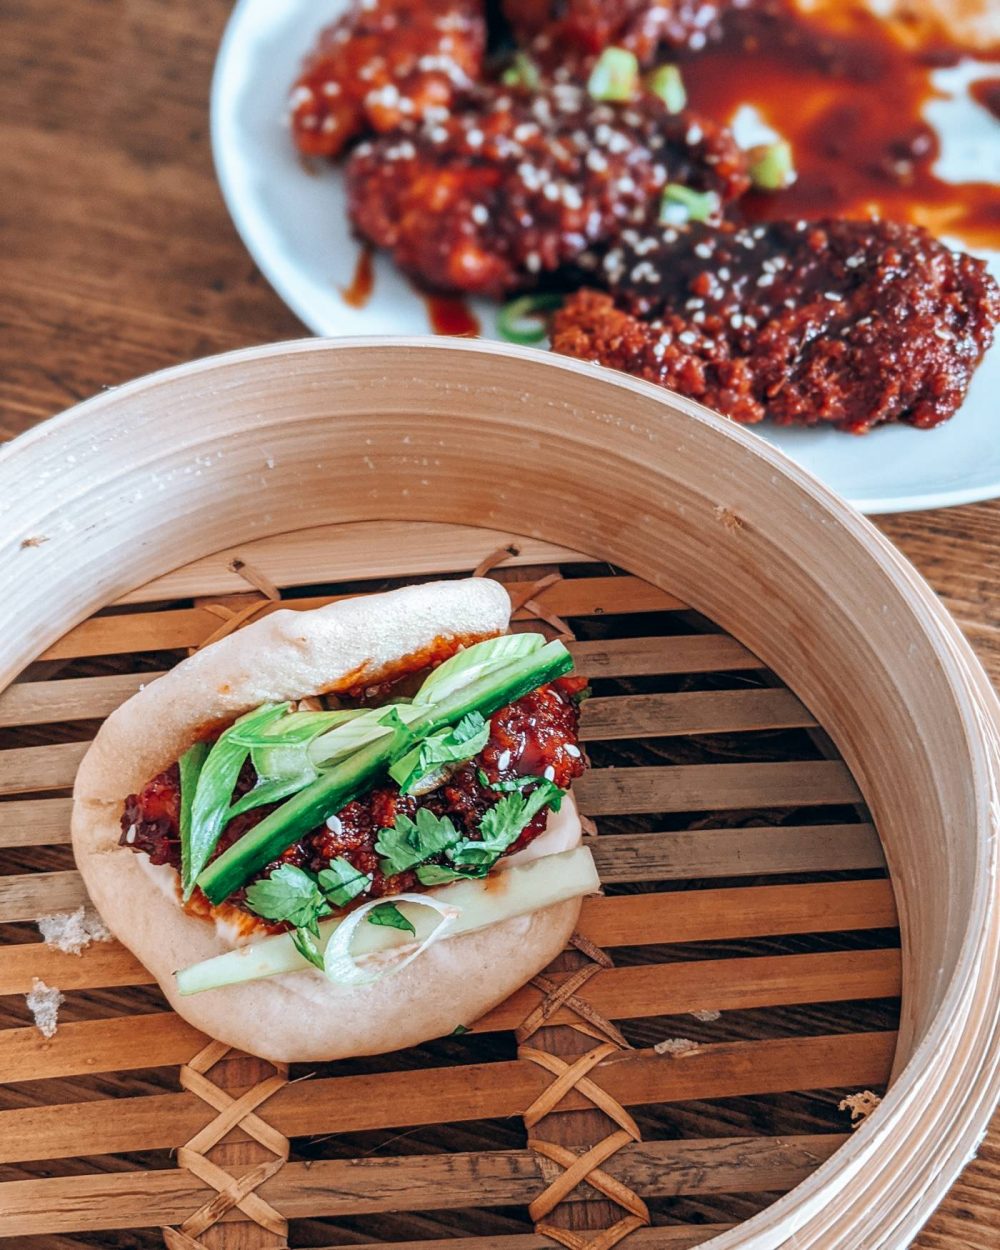
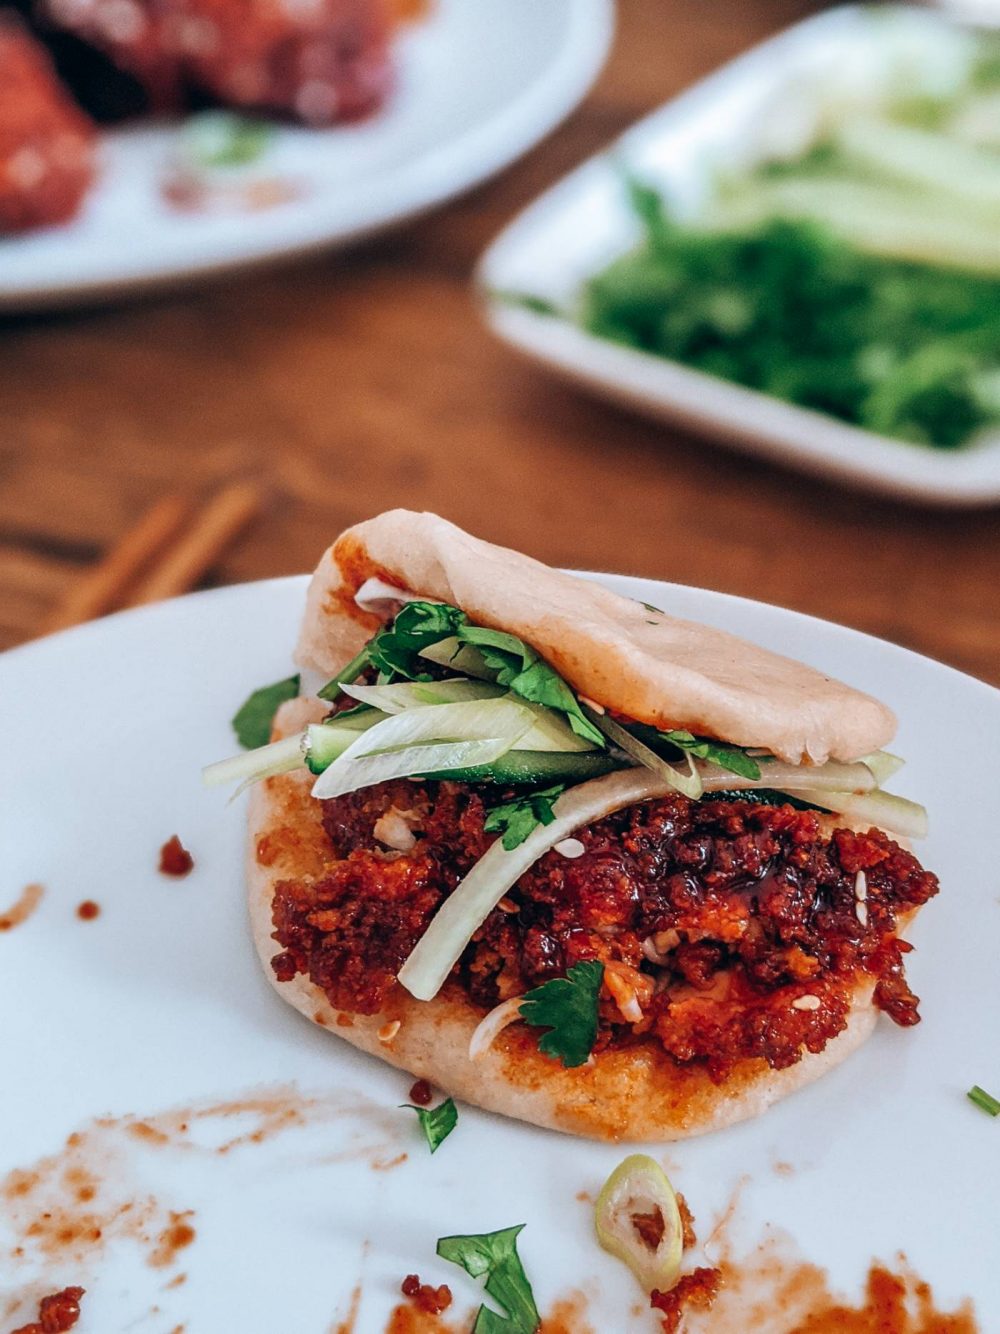
Breaded fried chicken in a spicy, fresh sauce, in a soft, steamed bun.
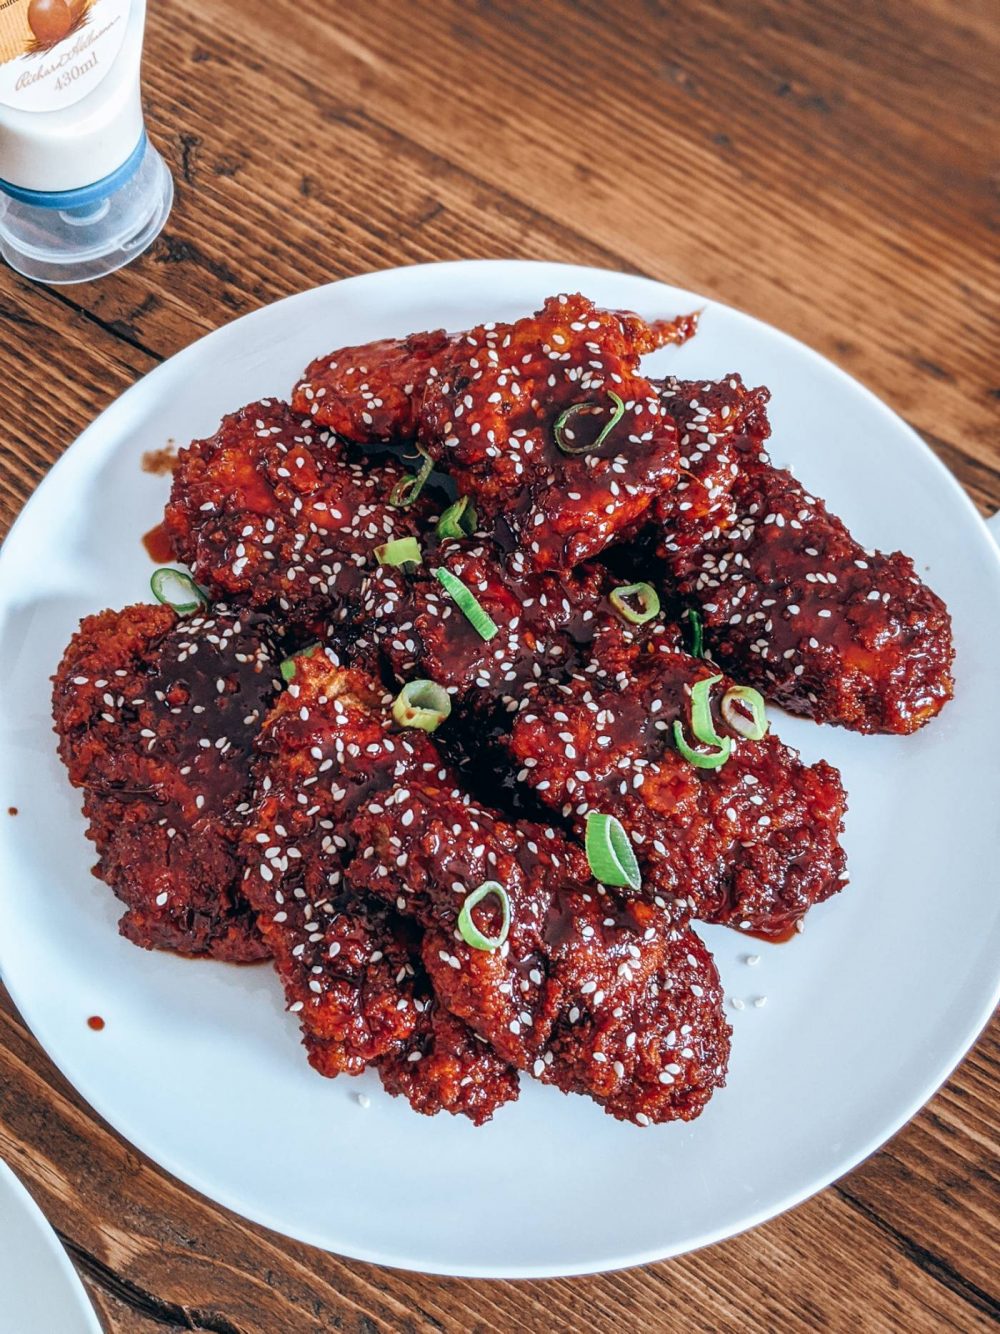
This works SO well in bao because you get spice, you get garlic, you get freshness from the ginger, plus a little saltiness from the soy. The chicken goes nice and crisp so there’s added texture too.
This sauce recipe one that I actually use a lot when I’m cooking at home. We make it with turkey meatballs, use it on salmon and occasionally in stir frys. It’s very easy and once you have the cupboard essentials, it’s a sauce that you can make time and time again.
Don’t eat meat? No problem. This sriracha sauce would be delicious on fried tofu or tempura veg!
Ingredients
Makes enough for 10 – 12 bao
- 5 chicken thighs
- Bread crumbs (I used 4 slices of bread blitzed in the food processor)
- 3 eggs, whisked
- Plain flour
- Vegetable oil
For the sauce:
- 250 ml sriracha
- 75 ml light soy sauce
- 100 ml honey
- 2 tablespoons rice vinegar
- Splash of Mirin
- half an inch of ginger, grated
- 2 garlic cloves, crushed
- Sesame seeds
How to make the chicken
Fry the chicken
- Tenderise the chicken thighs. Put them into a plastic bag and bash with a rolling pin until flattened. Then slice them into halves or quarters, depending on how big you want your chicken pieces to be.
- Put flour, the eggs and bread crumbs onto separate plates or bowls. Dip your chicken pieces into the flour, then egg, then breadcrumbs. Repeat until all pieces are covered.
- In a large pan, heat about 3-5cm of vegetable oil. Once the oil reaches 190 degrees, shallow fry your chicken. Turn on each side until cooked. A meat thermometer is a very handy thing to have in this case, but you can cut your chicken open to ensure it’s not pink inside.
- Put the fried chicken onto a plate covered in a kitchen towel to drain.
Make the sauce
- In a non-stick saucepan, add your sriracha, light soy, honey, dark soy, rice vinegar, Mirin, ginger and garlic. Gently cook on a low heat until the sauce thickens slightly. Don’t let it boil too much – keep it on a gentle simmer.
- Add the chicken thighs to a large bowl and toss in the sauce until completely coated.
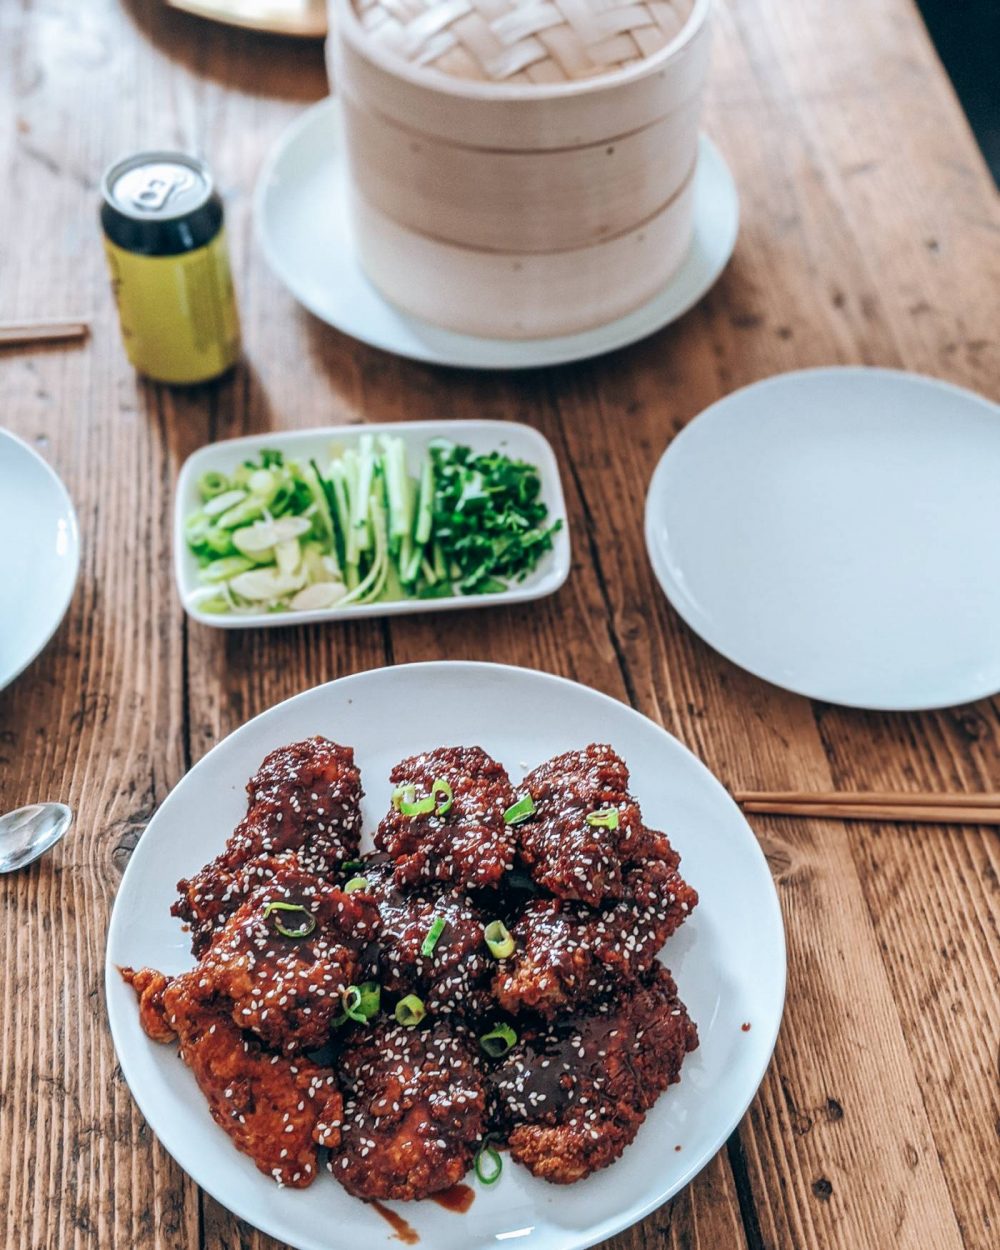
- Sprinkle with sesame seeds and sliced spring onion ready to go in the bao!
How to make Bao buns
We used this recipe by Izy Hossack for our bao buns. It was very straightforward in comparison to some bao recipes I found online (some took four hours!) It took just over two hours in total, which is perfect if you have fillings to make.
It’s worth saying that this recipe is vegan friendly. Some bao recipes feature milk or cream, which you can add instead of water to make a stickier dough, but to be honest, these were delicious as is!

Ingredients
Makes 20 buns (any leftovers are freezable!)
- 420g plain white flour, plus more for kneading
- 2 1/4 tsp (1/4 oz or 7g) easy bake yeast (instant yeast)
- 1 tbsp granulated sugar
- 1 tsp salt
- 250g warm water
- 2 tbsp vegetable oil, plus more for the bowl and brushing
- 1 tsp baking powder
How to make the bao
Make the dough and first rise
- Place the flour, yeast, sugar and salt in a large bowl. Stir together to combine.
- Add the warm water and vegetable oil to the bowl and stir together to form a rough dough. Tip the contents of the bowl out onto a work surface and knead together, dusting lightly with extra flour as needed to prevent it sticking to the surface (just try to add as little extra flour as possible). Knead for about 10 minutes – the dough will be slightly sticky and quite soft but should be stretchy and smooth.
- Pour a little extra vegetable oil into the bowl. Place the dough in and turn to coat with oil. Cover with a clean tea towel and leave somewhere warm for 1 hour to rise until doubled in volume. We left ours in the airing cupboard!
- Once the dough has risen, tip it out onto your work surface and pat out into a large rectangle. Sprinkle the baking powder all over the surface of the dough, roll it up, and then knead for 5 more minutes so the baking powder is incorporated.
Shape the buns and second rise
- Divide the dough into 20 equal pieces. Shape each of these into little balls, dusting with more flour as needed to stop them from sticking to the work surface.
- Cut 20 squares of baking paper, each roughly 3.5 inches (9 cm) wide.
- Take each ball of dough and roll it out into an oval about 3.5 by 4.5 inches (9 x 12 cm). Brush the surface of each oval with a light coating of vegetable oil. Fold each oval in half to get a half-moon shape. Place onto the individual squares of baking paper.
- Set aside to rise for 20 minutes on your counter so they get a bit puffy.
Steam the buns
- Gently place a few of the risen buns into your bamboo steamer. I bought an 8-inch steamer which fits 3 buns in each layer, so cooked 6 buns at a time. Carefully lower them in by grasping the corners of the baking paper square and leave a little room for expansion between each bun.
- Put the remaining risen buns on a baking tray in the fridge to stop them over proofing as the first batch steams.
- Fill a wide saucepan with 1 inch (3 cm) of water. Bring to the boil over medium heat then lower the bamboo steamer in, covering it with its lid. Turn the heat down so the water is simmering and let the buns steam for 6 minutes.
- Let cool slightly then remove from the steamer so you can steam the next batch, you may need to top up the water to prevent it running dry (you can take the dough straight from the fridge, no need to let it come to room temperature).
- Eat the buns warm! If they cool off, you can reheat them by steaming again for 2 minutes (same goes if you keep in the fridge and eat the next day)
How to serve your Bao
I like a bao with different textures, freshness and colour. You can totally experiment with different garnishes and extras on serving your bao depending on your filling.
For this Bao recipe, I chose thinly sliced cucumber, spring onion and a little coriander. We also spread a little mayo on the inside of the bun, add your chicken cucumber, onion and coriander. You could also quick pickle some red onion or carrot in some rice wine vinegar, or add some pickled ginger or kimchi – go wild!
Happy eating!
I hope you enjoyed this recipe and I can’t wait to see you try it. I’ve wanted to create more recipe posts for a while, but never had the time – I have plenty of it now! I want to inspire you to shop local and use those ingredients at home, so watch this space for more recipes from me and fellow foodies in Milton Keynes.
Have you made bao before? What’s your favourite filling?
Other posts you might also like:
- Best Asian Restaurants in Milton Keynes
- Lockdown Life: Things you can do at Home in Milton Keynes
- Lunch at Blossom Room, Milton Keynes
Pin it for later


Your chicken filling looks so delicious! We made Bao last year with Pork Belly but would love to try with something like this…
Life & Loves | A Food & Lifestyle Space
Thanks Chloe! We did pork belly too, it definitely helps that the chicken has some texture. Let me know if you try this! x
Can i steamed all of the buns and freeze it. Then steam it again if i want to?
Yes you can!